
Transforming My Rivian R1T into the Ultimate Overlanding Machine
Welcome to my journey of transforming the Rivian R1T into an overlanding powerhouse. Whether you're a fellow Rivian enthusiast or planning your own build, this blog is your one-stop resource for all things Rivian modification. Looking for our camping gear? You can find that on this list.
The Rivian R1T: Our Choice and Thoughts
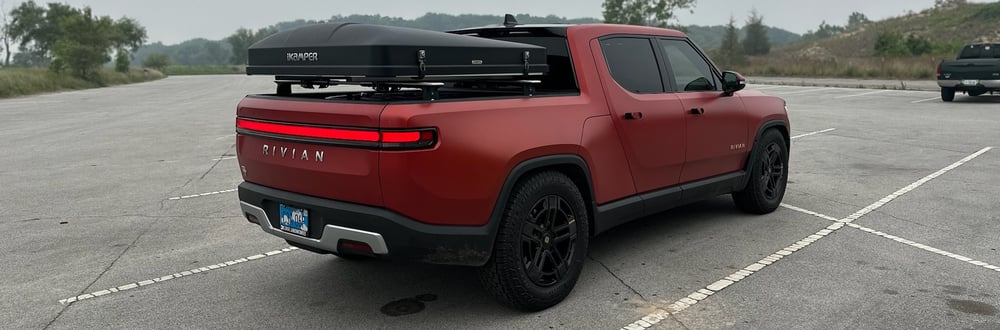
In May 2023, we took the plunge and purchased a Rivian R1T. At that time, the only available option was the large pack with quad motors. In hindsight, the Max pack might have been a better choice for that extra range, but we're still pondering if the dual motor would have been a better trade-off for range over power, especially for off-roading. We chose the striking Canyon Red with the Ocean Coast interior, reminiscent of our positive experience with a similar interior in our Tesla Model 3. For tires, we went with All Terrain to ensure maximum off-road capability, and we didn't skimp on the underbody protection to safeguard the truck's underside during our adventures.
Post-Purchase Modifications
Our first stop after getting the truck was Oz Braz in Arizona (Oz Braz website). We opted for Paint Protection Film (PPF) and window tinting. The PPF is a game-changer for off-roading, protecting the paint from scratches and 'pin stripes'. My trust in Oz Braz is unwavering, especially after a service team praised the quality of their PPF work on my Tesla. As for tinting, we went as dark as legally allowed in Phoenix, though regrettably, tinting the roof and windshield isn't permissible here. If it were, I'd have gone for that too. Additionally, we had the truck ceramic coated, which I've found makes washing the car a breeze and helps water slide right off.
Tire Protection and Maintenance
I highly recommend visiting Discount Tire for their tire protection plans. We added certificates to our Rivian's factory tires and opted for unlimited rotations. This isn't an immediate necessity (I did it after a road trip), but it's something to consider for long-term maintenance and peace of mind.
Essential Accessories for the Rivian R1T/R1S
Transforming our Rivian into a versatile overlanding vehicle involved more than just mechanical upgrades. We've also added a range of accessories to enhance functionality and aesthetics. Here's a rundown of what we chose:
- 3DMaxpider Floor Mats: These mats are a perfect fit for the Rivian, offering excellent protection against dirt and spills. They're easy to clean and maintain, making them a must-have for any off-road or outdoor adventure
- TWRAPS Armrest Organizer: This handy organizer for the Rivian R1T/R1S keeps the center console area neat and accessible. The yellow color adds a vibrant touch to the interior.
- Samsung T5 SSD - Use for gear guard.Then I have that connected to this braided USB cable with this adapter to make it bend at 90 degrees so it is not sticking out and accidentally breaking.
- Spigen Tempered Glass Screen Protector: Designed specifically for the Rivian's 15.6" dashboard touchscreen, this matte, anti-fingerprint screen protector is a breeze to install and keeps the front screen pristine.
- TWRAPS Screen Protectors for Rear and Dash Screens: To protect the rear and dash screens, especially when loading items in the back seats, these PET-based, easy-to-install protectors are ideal.
- BestEvMod Lower Center Console Organizer Tray: This ABS material tray with PVC trim is a great addition for extra storage in the Rivian R1T & R1S.
- OrnVeh Tow Hook Covers: These yellow tow hook covers are not just functional; they add a striking accent to our 'Flash' themed build.
- S00NISH Premium Phone Charger: The standard Rivian chargers were replaced with this more efficient option, compatible with Apple Magsafe adapters for future upgrades.
- OpenSourceEV Left Phone Ball Mount V2: This mount is perfect for securing the wireless phone charger on the left side.
- Alogic Matrix+ Battery Pack Qi2 Wireless Charging Pack - Don’t get just a normal charging pad for your truck. Get one that turns into a battery so you can keep charging up your phone if you leave your truck. The best part is it’s Qi2. If you don’t know the difference between Qi and Qi2, read this article.
- Scosche OBD-II To USB Connector: A simple solution for powering the phone on the left side, this connector is a small but crucial addition.
- MAIKER Tactical Car Seat Back Organizer: Ideal for storing camping essentials like headlamps, batteries, and handheld radios for quick access.
- nzonpet 4-in-1 Dog Car Seat Cover: This cover fits the Rivian perfectly, protecting the seats while accommodating our furry friends.
Enhancing Communication with Midland Radio Gear
A key aspect of our Rivian build is ensuring reliable communication, especially important for off-roading and overlanding adventures. Here's what we've added to stay connected:
- Midland – MXT275VP4 15 Watt GMRS MicroMobile Two-Way Radio: This powerful radio is perfect for ATVs, UTVs, and off-road vehicles. The kit includes an extended 3dB gain roll bar mount antenna and a microphone extension cable, making it versatile for various setups. I'm considering an upgrade to the MXT575 since I now am hardwired in and would love more power. My advice: get the complete kit from the start for the best setup.
- Midland – MXTA27 MicroMobile Universal Lip Mount with NMO Connector: If you're not mounting the radio to a rack, this lip mount is ideal for attaching it to your vehicle's hood. It comes with a 6M cable for easy installation.
- Sherpa Antenna Mount - If you want to attach your low-profile antenna to your roof rack, you need this.
- OpenSourceEV 1” Ballmount: This mount is perfect for securing the Midland radio in the vehicle.
- Etsy Radio Mount for Midland MXT 275: I found this fantastic mount on Etsy, which attaches seamlessly to the ball mount, providing a sturdy and accessible setup for the radio.
- RAM Mounts RAM-B-201U Double Socket Arm (Medium): This double socket arm is a crucial component for mounting the radio securely and ensuring it stays in place during rugged drives.
Charging Solutions for the Road
In our quest to make our Rivian R1T as versatile and travel-ready as possible, we've included some essential charging accessories. These have proven invaluable, especially when venturing into remote areas or during unexpected situations:
- RV Park Charging Adapter: To conveniently charge our Rivian at RV parks, we use a specific adapter that allows us to plug into a 30amp RV outlet. This has been a game-changer for extended trips where traditional EV charging stations might not be available.
- Tesla Charger Adapter: Keeping this adapter in the truck has been a lifesaver. It enables us to use Level 1 or Level 2 Tesla chargers in a pinch. This came in particularly handy during a power outage caused by a tornado in Oklahoma. It's a must-have for any EV owner who might find themselves in less-than-ideal charging situations.
Off-Roading Essentials for the Rivian
Off-roading requires specific gear to ensure safety and efficiency. Here's a breakdown of the off-roading accessories I've added to my Rivian, making each adventure smoother and more enjoyable:
- MORRFlate Quad+ 4-Tire Hose Kit: This kit allows for quick and efficient airing up and down of tires, essential for varying off-road conditions. The built-in gauge is a great feature for precise pressure adjustments.
- MORRFlate 7.5ft Extension for Rivian: This extension is a must-have to easily connect the hose kit to the compressor without bending over. It's specifically designed for the Rivian, ensuring a perfect fit.
- Rapid Tire Deflators: For those not ready to invest in the MORRFlate system but still looking for a quick way to air down tires, these deflators are a great alternative.
- Recovery Gear: The Rivian's own recovery kit is an excellent option, featuring high-quality gear from Factor 55. For additional recovery options, I recommend:
- Hitch Link Receiver
- Locking Pin
- Budget-Friendly Recovery Gear Alternatives:
- D Ring Shackles
- Soft Shackle
- Tow Strap
- Kinetic Rope
- Tree Saver
- WARN Gloves: Essential for safe handling of recovery gear.
- Maxtrax: We chose the yellow Maxtrax for their reliability and visibility.
- Rivian Maxtrax Mounts: These are specifically designed to work with the Overland Ruff Rax, unlike standard Maxtrax holders.
- DMOS Shovel Holder: This lockable shovel holder is versatile and works with any shovel.
- GP Factor Shovel: Chosen for its cost-effectiveness and to avoid the risk of chipping paint, which I've heard can be an issue with the DMOS shovel.
Car Detailing Products for the Rivian
Maintaining the Rivian's aesthetic appeal is just as important as its functional upgrades. Here's a comprehensive list of the car detailing products I use, categorized for easy reference:
Chemicals for Cleaning and Protection
- Optima No Rinse (ONR): Essential for pre-wash.
- P&S Bug Off: Perfect for removing bugs, especially after road trips.
- P&S Brakebuster: Wheels and tires. Doesn't smell. Amazing.
- Koch Chemie GSF: Ideal for foam cannon and 2 bucket system wash.
- Gyeon Medium Leather Cleaner: Prepares seats for ceramic coating.
- Gyeon Leather Shield: For ceramic coating the seats.
- P&S Interior Cleaner: For interiors
- 303 Aerospace Protectant: Protects the interior.
- P&S Bead Maker: Works as a topper/drying aid.
- Invisible Glass: For glass inside and out
- Carpro PERL: For tires and exterior plastics.
- Koch Chemie Greenstar: Cleans floor mats
- P&S Carpet Bomber: For deep carpet cleaning.
- Air Spencer CS-X3 Car Air Freshener: Squash scent.
- P&S Rags to Riches: Cleans microfibers.
Detailing Gear
- Microfiber Madness Incredibrush: Cleans inside of tires
- EZ Detail Brush - For wheels.
- Obsessed Garage 2 Bucket Kit
- Microfiber Madness Incredimitt
- Airforce Blaster Sidekick: Dries nooks and crannies
- EGO Power+ LB6504 650 CFM Blower: For drying most of the car. Also get the Stubby Nose attachment.
- Invisible Glass Reach and Clean Tool
- ANUINIT Car Wash Brush: For roof and hood.
- Detail Factory - Curveball XL Synthetic Brush: Applies CarPro PERL.
- Wheel Woolies 9" Wheel & Fender Brush: Cleans wheel faces.
- Detail Factory Ultra-Soft Detailing Brush Set: Great for interiors.
- Drill Brush White - Drill Brush Attachment Set: For scrubbing floor mats.
- The Rag Company Goizper Group iK Sprayers - Foam Pro 12 Pump Sprayer
Towels
- The Rag Company: Offers a wide range of high-quality towels. Specific picks can be shared upon request. A lot of their products are on Amazon too.
Pressure Washer Setup
- Active 2.0 Pressure Washer
- Active Wall Mount Accessory Package - Ultimate
- Active Sprayer/Wand/Foam Cannon Upgrade Kit - Ultimate
- Undercarriage Cleaner
Road Trip Cleaning Kit
- Bag
- Bottles
- Glass Cleaner
- Waterless Wash
- Bug Remover
- Interior Cleaner
- General Wash Towels
- Interior Towels
- Window Towels
- Dirty Towel Bag
Overlanding Setup for the Rivian R1T
When it comes to serious overlanding, choosing the right gear is crucial. Here's a breakdown of the overlanding and roof rack equipment we've chosen for our Rivian:
Roof and Bed Racks
- Overland Ruff Rax Roof Rack: We opted for the Overland Ruff Rax (ORR) roof rack for several reasons: minimal wind noise (especially compared to Front Runner racks), a badass look that complements the truck, and the functionality of the side panels on the bed rack for additional storage. Note: Choose this specific version only if you plan to add a lightbar; otherwise, opt for the non-light bar version.
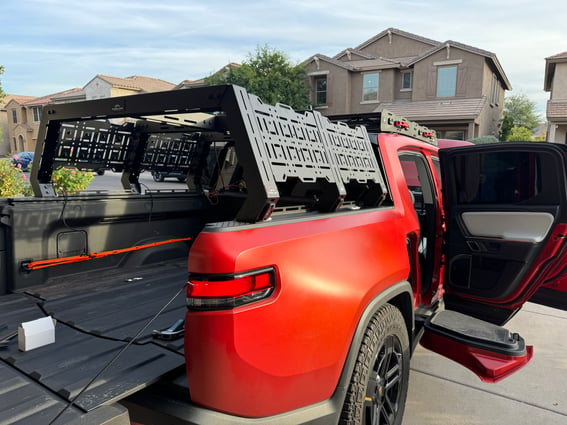
- Overland Ruff Rax Bed Rack: This complements the roof rack and offers additional storage solutions.
- Handles for Roof and Bed Racks: We added two pairs of handles for the roof rack and three for the bed rack. Note: If you plan to mount Maxtrax on your bed rack, these handles will not be usable on that side. So, if you plan to mount Maxtrax on the outside, buy only one pair for the bed rack.
- ORR Inside Molle Panels: Consider this if you plan to do Maxtrax; it allows mounting on the inside and if you want the handles, those will prevent you from mounting MaxTrax to the outside.
- ORR Roof Rack Noise Reducer: This strip fills in the gap and kills wind noise.
- ORR Wire Harness for Bed and Roof Racks: Essential for connecting lights.
- ORR iKamper Kit: For attaching the iKamper to the rack.
- ORR Angled Brackets: These brackets are used to angle two of the roof rack lights towards the ground, illuminating the area near the doors.
- ORR 11-inch Awning Bracket - If you plan to do a 270 awning or mount your awning off your bed rack with the iKamper, you will need this. Mounting it directly off the roof won’t work, and the iKamper will hit the awning.
iKamper Skycamp Mini 3.0: Enhancing Our Overlanding Experience
Choosing the right rooftop tent is crucial for comfortable overlanding, and we decided on the iKamper Skycamp Mini 3.0. Our decision was influenced by Charge Overland's endorsement and the positive feedback from many users. What we love most is the convenience of leaving our bedding, including pillows (compressed with vacuum bags), inside the tent. Here are some accessories we added to elevate our camping experience:
- LED Light Strip: This provides illumination inside the tent, making it cozy and functional after dark.
- Always-On Battery Pack: Essential for powering the LED strip without the need to climb into the tent to turn on the battery, saving us a step.
- Storage Net: We use this to store our warm clothes and jackets while we sleep, keeping the tent organized.
- Window Rainfly Holder: Before we had the roof and bed racks, this was used to extend the window awning over the roof.
- Motion-Detecting Ladder Lights: These USB-chargeable lights provide visibility under the ladder, especially useful for nighttime bathroom trips. I wish they offered both warm and cool light options, but warm light is preferable for reducing bugs.
- Tent Carpet: Adding carpet to the bottom of the tent helps retain warmth, making it more comfortable in cooler conditions.
- Shoe Organizer: Hung underneath the tent, this organizer is perfect for storing shoes and other small items, keeping our space tidy and organized.
Campstream One: A Game-Changer for Tent Climate Control
For enhanced comfort during our overlanding trips, we've added the Campstream One to our setup. This innovative device diverts air from our truck directly into the tent, ensuring a comfortable temperature regardless of the outside conditions.
- Climate Control: It's been a significant upgrade in maintaining a comfortable environment inside the tent.
- Ease of Use: The Campstream One is user-friendly and integrates seamlessly with our existing setup.
- Efficiency: By utilizing the truck's air system, it provides an effective solution without the need for additional equipment.
I've also shared more about our experience with the Campstream One in a detailed video, where I talk about its features, installation, and overall performance.
Technical Insights: Wiring for Lights, Starlink, and Radio
Getting technical with the wiring setup for our Rivian's lights, Starlink, and radio was a detailed process. Here’s a detailed walkthrough for how I did this all.
Central Control
- Garmin PowerSwitch: This acts as the central hub for most of our equipment. The only exception is the Rigid Industries Adapt light bar, which is directly connected to the battery for on/off control via phone.
Wiring Process
- Routing: I ran a 7-wire trailer wire from the Garmin down the passenger footwell, along the side trim to the backseat, and through a small hole on the driver's side after removing the backseat.
- Connections: Using waterproof connectors, I created six disconnects for the Midland radio, lights, and Starlink. The seventh black wire serves as our ground to the front of the truck.
Installation Tools and Accessories
- 12 Gauge Wire and 1/2 Inch Loom for protection.
- Crimping Tool, Crimp Wire Connectors, and Terminal Connectors for secure connections.
- Magnet Zip Tie Holders and KC Wire Hider for cable management.
- 1/2inch Heat Shrink, Heat Shrinker, and Wire Inserter for insulation and ease of installation.
- Scotch Heavy Duty Fasteners and Loctite for additional security.
Current & Future Lights
- Rigid 40” Adapt Backlit Lightbar with GPS: Chosen for its adapt functionality, RGB feature, and local Arizona manufacturing. The beam narrows as you drive faster, which is incredibly useful.
- Whip Flag Lights - If you ever plan on going in the dunes or doing some serious fast off-roading. You will need whip flags. If you’re like me, why not have them light up so you can also off-road at night? I used these brackets, attached them to back of the bed rack and bend them down so they didn’t hit the tent as much.
- Rigid Chase Bar - I added this Rigid Chase Bar for dusty off-roading and when it’s dark. It’s pretty overkill but still awesome. I used these T-brackets to create a new mounting point on the back of the bed rack for this bar.
- Future Additions: Planning to add Rigid ditch lights and work lights with built-in switches for the truck bed.
Connectivity, Shelter, and Shower Solutions for Overlanding
Starlink Modification for Enhanced Connectivity
- Unique Componentry: We chose Unique Componentry for modifying our Starlink dish. Their professional service ensured a watertight modification, and we didn't have to risk DIY methods. We opted for an Ethernet port installation, which was ideal since our setup is connected to the Garmin Power switch, eliminating the need for the switch module.
Awning for Comfort and Protection
- 23Zero 270° Peregrine Awning: We selected the left-hand mounted version with 2.0 Light Suppression Technology, as our tent opens on the right. The 23Zero awning was our top choice for its large size and complete sun blocking capability. We also added walls to the awning, providing a sheltered space on windy days.
- 23Zero XD Awning Quick Release Hitch Mount - Okay hear me out, this one seamed dumb. I was planning to leave the awning up all of the time, so why on earth do I need a way to quick release. One reason, installing the damn thing. Without this, it is easily a 2 person job to take the awning up and down. Make your spouse approval rating go higher and just get these, plus if you ever want to take it down (you know to improve the range of your truck). I thought it was not needed, but now I wish I had it from the beginning just to make the install easier at least.
Shower Setup for Convenience
- KickAss Premium Shower Awning: Initially considering the 23Zero for its roof feature, we ultimately chose the KickAss brand when it went on sale. Its affordability and functionality made it a great choice.
- Yakima RoadShower: This is our go-to shower solution, providing convenience and ease of use during our travels.
Next Project: Rock Solid Internet
I work remotely, and I do a lot of video calls because I’m a manager. So I need super solid internet so I can stay connected with my team on a consistent internet connection. One of my favorite things to do is extend a trip and work while on the road between our trips. Frequenly we do cross country road trips and instead of taking time off from work, I bring the work with me
So when I first started exploring this project I was contemplating building a homelab for the truck complete with WeBoost, Firewalla Gold Plus Router, Aruba 25 Instant On AP, and Netgear M6 Pro Hotspot but like all overengineered solutions, I eventually found there is a simplier way and it's called Peplink. Essentially it’s a hotspot, router and access point all in one. The important piece of the tech, though, is that it has the ability to bring the Starlink connection in a bonded connection with the cell wireless plan (5G). This means it will truly create a seamless connection so if Starlink goes down for a minute, 5G can fill in for the few seconds it’s obstructed. My Firewalla idea, while advertising a bonded connection would have major issues. Just look at the guide about Peplink’s Speedfusion to understand the challenges.
So I am picking up a Peplink BR1 Max 5G. This is the 5G version that has ethernet in for the Starlink. The only downside is while it supports tow cell SIMs (think having Verizon and T-Mobile for max coverage), you can only use one at a time. So if you need to switch between Verizon and T-Mobile you have to switch it over manually. Or if you want maximal coverage and speed, you might want two 5G modems. Go for the Peplink BR2 Max Pro 5G. Some might say, well, what if I don’t have cell service so should I get a WeBoost? Well, that’s where Peplink makes their own external antennas. The best part is it doesn’t only rebroadcast the improved cell service into your truck, but it has an antenna to broadcast outside so you can enjoy your faster and more reliable internet connection- OUTSIDE. Lastly, one of the cool feature is it can connect to another wifi network and bring that internet connection into the mix as well. So if you’re at a campsite that has meh wifi, you can still bring it in your entire Starlink/5G mix.
The hidden best feature is this stuff is used by RVers across the country so there is a huge amount of people using this for the exact reason I need it too. Also it’s designed to take a beating and used for commerical purposes.
What About Your Camping Gear?
Looking for our list of all of our camping gear? You can find that on this list.
Thank you!
I hope this blog post has been informative and inspiring for fellow overlanding enthusiasts and Rivian owners. Whether you're just starting out or looking to upgrade your setup, remember that the journey is as important as the destination. Happy overlanding, and here's to many more adventures on the road!
PS: If you live in Arizona, come join the Arizona Rivian Club!